
Vue Router学习笔记
Vue Router学习笔记
学习时间:2025年10月2日
1 入门
Vue Router 是 Vue 官方的客户端路由解决方案。
客户端路由的作用是在单页应用 (SPA) 中将浏览器的 URL 和用户看到的内容绑定起来。当用户在应用中浏览不同页面时,URL 会随之更新,但页面不需要从服务器重新加载。
1.1 示例
1 | <template> |
在这个 template 中使用了两个由 Vue Router 提供的组件: RouterLink 和 RouterView。
不同于常规的 <a> 标签,我们使用组件 RouterLink 来创建链接。这使得 Vue Router 能够在不重新加载页面的情况下改变 URL,处理 URL 的生成、编码和其他功能。
RouterView 组件可以使 Vue Router 知道你想要在哪里渲染当前 URL 路径对应的路由组件。它不一定要在 App.vue 中,你可以把它放在任何地方,但它需要在某处被导入,否则 Vue Router 就不会渲染任何东西。
1.2 创建路由实例
通过调用 createRouter() 函数创建:
1 | // 位置:/src/router/index.ts |
1.3 注册路由插件
一旦创建了我们的路由器实例,我们就需要将其注册为插件,这一步骤可以通过调用 use() 来完成。
1 | // 位置:/src/main.ts |
1.4 在组件中使用路由
在组合式API中:
| 特性 | useRouter() |
useRoute() |
|---|---|---|
| 返回类型 | Router 实例 |
当前路由对象 |
| 功能 | 控制导航行为,如跳转、前进、后退、添加路由等 | 获取当前路由的状态,如路径、参数、query、meta 等 |
| 是否响应式 | 否 | 是 |
| 常用方法 | push, replace, back, addRoute |
无方法,仅属性 |
| 常用属性 | - | path, params, query, meta, name |
| 典型用途 | 页面跳转 | 显示当前页面信息、读取参数 |
代码示例:按钮点击后跳转到下一个页面,并携带当前参数
1 | <!-- src/views/User.vue --> |
效果:当用户在 /user/101 时点击按钮,会跳转到 /user/102
2 路由基础
2.1 动态路由匹配
很多时候,我们需要将给定匹配模式的路由映射到同一个组件。例如,我们可能有一个 User 组件,它应该对所有用户进行渲染,但用户 ID 不同。在 Vue Router 中,我们可以在路径中使用一个动态字段来实现,我们称之为路径参数:
1 | import User from './User.vue' |
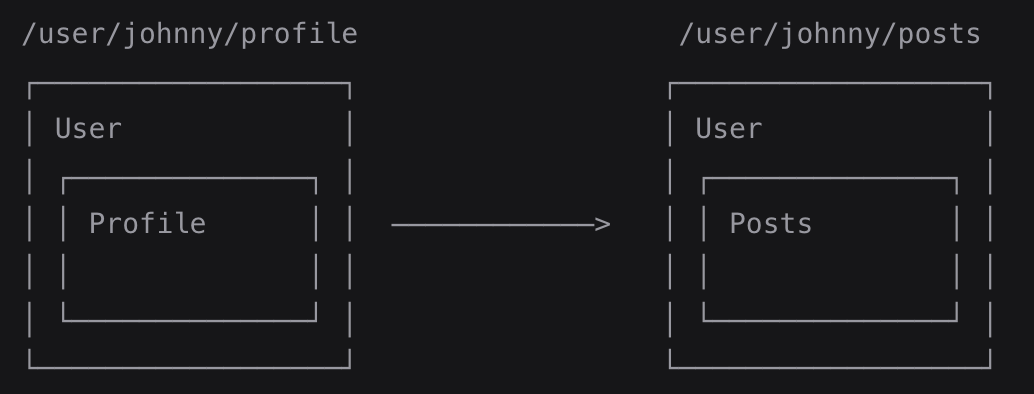
现在像 /users/johnny 和 /users/jolyne 这样的 URL 都会映射到同一个路由。
2.2 嵌套路由 children
一些应用程序的 UI 由多层嵌套的组件组成。在这种情况下,URL 的片段通常对应于特定的嵌套组件结构,例如:
示例
1 | <!-- App.vue --> |
1 | <!-- User.vue --> |
1 | import User from './User.vue' |
这里的 <router-view> 是一个顶层的 router-view。它渲染顶层路由匹配的组件。同样地,一个被渲染的组件也可以包含自己嵌套的 <router-view>。例如,如果我们在 User 组件的模板内添加一个 <router-view>:
1 | <!-- User.vue --> |
要将组件渲染到这个嵌套的 router-view 中,我们需要在路由中配置 children(嵌套路由):
1 | const routes = [ |
2.3 命名路由
当创建一个路由时,我们可以选择给路由一个 name:
1 | const routes = [ |
然后我们可以使用 name 而不是 path 来传递 to 属性给 <router-link>:
1 | <router-link :to="{ name: 'profile', params: { username: 'erina' } }"> |
所有路由的命名都必须是唯一的。如果为多条路由添加相同的命名,路由器只会保留最后那一条。
2.4 编程式导航
2.4.1 push
该方法会向 history 栈添加一个新的记录,所以,当用户点击浏览器后退按钮时,会回到之前的 URL。
| 声明式 | 编程式 |
|---|---|
<router-link :to="..."> |
router.push(...) |
该方法的参数可以是一个字符串路径,或者一个描述地址的对象。例如:
1 | // 字符串路径 |
2.4.2 replace
它的作用类似于 router.push,唯一不同的是,它在导航时不会向 history 添加新记录,而是取代了当前的条目。
| 声明式 | 编程式 |
|---|---|
<router-link :to="..." replace> |
router.replace(...) |
2.5 重定向
通过配置routes的redirect来指定:
1 | const routes = [{ path: '/home', redirect: '/' }] // 将/home重定向至/ |
2.6 历史模式
在创建路由器实例时,history 配置允许我们在不同的历史模式中进行选择。
2.6.0 背景回顾
重点:浏览器不会把 # 及其后的内容(fragment/哈希片段)包含在 HTTP 请求里。
解释:也就是说,当 URL 是 https://example.com/#/about 时,浏览器发给服务器的请求只是 GET /(可能带查询 ?a=b,但不带 #/about)。这个行为是由 URL 的 fragment 定义决定的——fragment 仅在客户端使用(锚点、JS 读取),不会被送到服务器。
前提假设
假设有三个 SPA 路由:/、/about、/users/123。站点域名是 https://example.com。
2.6.1 Hash模式
hash 模式是用 createWebHashHistory() 创建的:
1 | import { createRouter, createWebHashHistory } from 'vue-router' |
示例
URL示例:
https://example.com/#/abouthttps://example.com/#/users/123
浏览器向服务器发送的请求(初始加载或刷新):
- 无论地址栏为什么
#/...,服务器只会收到GET /(即请求根页面index.html)。- 例如:地址栏是
https://example.com/#/about→ 请求:GET / - 例如:地址栏是
https://example.com/#/users/123→ 请求:GET /
- 例如:地址栏是
- 原因:
#及之后是 fragment,不会出现在 HTTP 请求行中。
客户端发生了什么:
- 浏览器收到
index.html并执行 JavaScript。 - SPA 中的路由器读取
location.hash(例如#/about),对应到 About 组件并渲染它。 - 在客户端点击导航或
router.push('/users/123')时,URL 只改location.hash,不会向服务器发请求(单页面内部切换)。
刷新是否会 404?:不会(只要服务器能返回首页 index.html),因为服务器始终接收 / 的请求并返回 index.html。
适用场景:静态托管(GitHub Pages、某些 CDN),无法或不想配置服务器 fallback 时用它最简单、最可靠。
2.6.2 HTML5模式
用 createWebHistory() 创建 HTML5 模式,推荐使用这个模式:
1 | import { createRouter, createWebHistory } from 'vue-router' |
示例
URL示例:
https://example.com/https://example.com/abouthttps://example.com/users/123
浏览器向服务器发送的请求(初始加载或刷新):
- 当地址栏是
https://example.com/about,浏览器会发GET /about给服务器。- 如果服务器上没有
/about静态文件或未做 fallback,则服务器会返回 404。 - 如果服务器把所有未知路径都返回
index.html(即配置了 SPA fallback),则服务器返回index.html,客户端路由接管显示About。
- 如果服务器上没有
客户端发生了什么:
- 浏览器打开
https://example.com/about→ 请求GET /about→ 服务器返回index.html(必须配置)。 - SPA 初始化后,路由器读取当前路径
/about并渲染 About 组件。 - 在客户端内部导航(
router.push('/users/123'))时,history.pushState()更新地址栏为/users/123,不会发出网络请求(只是修改历史记录),页面组件切换由前端完成。
刷新是否会 404?:
- 可能会,取决于服务器配置:
- 若 无 fallback(例如未配置 Nginx/Express),刷新
/about会让服务器尝试查找/about文件,找不到就返回 404。 - 若 有 fallback(统一返回
index.html),刷新就不会 404。
- 若 无 fallback(例如未配置 Nginx/Express),刷新
服务端配置:
例如Nginx:
1 | location / { |
| 行 | 作用 | 说明 |
|---|---|---|
location / |
匹配所有请求路径 | 比如 /, /about, /users/123 |
try_files $uri $uri/ /index.html; |
尝试依次查找文件 | 1. $uri:直接访问的路径(例如 /about)2. $uri/:如果是目录形式(例如 /about/) 3. /index.html:如果前两个都不存在,则返回 index.html |
适用场景:
- URL 更“干净”没有
#,对用户和 SEO(在 SSR/预渲染场景下)更友好。 - 推荐用于能控制服务器配置的生产环境(自建服务器、可配置的托管服务)。
2.6.3 Memory模式
Memory 模式不会假定自己处于浏览器环境,因此不会与 URL 交互也不会自动触发初始导航。这使得它非常适合 Node 环境和 SSR。它是用 createMemoryHistory() 创建的,并且需要你在调用 app.use(router) 之后手动 push 到初始导航。
1 | import { createRouter, createMemoryHistory } from 'vue-router' |
该模式不推荐使用。
3 路由进阶
3.1 导航守卫
导航守卫的层级:全局的,单个路由独享的,或者组件级的。
3.1.1 全局导航守卫
① 前置守卫 beforeEach
全局前置守卫(router.beforeEach)是 Vue Router 提供的一个拦截路由跳转的机制。在每次路由跳转前都会被调用,可以用来:
- 判断用户是否登录
- 验证访问权限
- 动态修改跳转目标
- 控制是否允许继续跳转(放行或中断)
基本语法:
1 | router.beforeEach((to, from, next) => { |
| 用法 | 说明 | 示例 |
|---|---|---|
next() |
直接放行 | 继续路由跳转 |
next(false) |
中断导航 | 停留在原页面 |
next('/login') |
重定向 | 跳转到登录页或其他路径 |
示例代码
1 | import { createRouter, createWebHistory, RouteRecordRaw } from 'vue-router' |
路由跳转流程,假设用户访问 /admin:
| 步骤 | 行为 | 结果 |
|---|---|---|
| 1 | Vue Router 检测到目标路径 /admin |
触发 beforeEach |
| 2 | 发现该路由需要登录 (requiresAuth: true) |
检查 token |
| 3 | token 不存在 | 执行 next('/login') 重定向 |
| 4 | 页面跳转到登录页 /login |
Vue 渲染登录页面 |
| 5 | 登录成功后保存 token | 用户再访问 /admin |
| 6 | token 存在且角色匹配 | 执行 next() 放行 |
| 7 | afterEach 执行,修改网页标题 |
显示 “管理页 |
② 解析守卫 beforeResolve
解析守卫在所有导航被确认之前、但在所有组件内的 beforeRouteEnter 守卫被调用之后触发。也就是说,它是整个导航流程中最后一个可以阻止导航的机会。
适用:异步数据加载、权限验证和路由确认阶段的逻辑控制。
基本语法:
1 | router.beforeResolve((to, from, next) => { |
示例代码
1 | // 全局解析守卫:加载必要数据(异步) |
③ 后置钩子 afterEach
afterEach 是 Vue Router 提供的全局后置钩子。它会在每次导航成功结束后触发。
特点:
- 没有
next(),无法中断或修改导航。 - 专门用于执行副作用操作(side effects),比如修改标题、关闭加载条、埋点统计等。
语法:
1 | router.afterEach((to, from) => { |
代码示例
1 | // ======================= |
3.1.2 路由独享守卫
可以直接在路由配置上定义 beforeEnter 守卫:
1 | const routes = [ |
3.1.3 组件内守卫
暂略
3.2 路由元信息 meta
在 Vue Router 中,每个路由对象都可以包含一个可选的 meta 字段,用于存储该路由的自定义信息。
它不会直接影响路由的匹配行为,但可以在全局守卫、组件、导航菜单等地方使用。
3.2.1 基本用法
定义一个带 meta 的路由:
1 | // src/router/index.ts |
3.2.2 常见使用场景
① 设置页面标题
在全局前置守卫中读取 meta.title:
1 | // src/router/index.ts |
效果:当访问 /admin 时,浏览器标签自动显示为「后台管理」。
② 登录权限控制
1 | router.beforeEach((to, from, next) => { |
③ 角色权限控制
1 | router.beforeEach((to, from, next) => { |
④ 组件缓存控制
有时我们希望某个页面返回后保留原状态(例如分页、搜索条件等)。详见:3.3.2.①
3.2.3 meta的类型定义
在 TypeScript 项目中,可以通过模块扩展给 RouteMeta 添加类型定义。
1 | // src/router/types.d.ts |
这样在使用 to.meta.xxx 时就有完整的类型提示。
为了确保TypeScript 能识别这个文件,在 tsconfig.json 里加上:
1 | { |
3.3 RouterView插槽
3.3.1 基本使用
前提知识:
<RouterView> 是用来渲染当前激活路由所对应组件的占位符。
1 | <template> |
当切换路由时,<RouterView> 会自动根据当前的路由匹配,加载相应的组件。例如:
1 | // router/index.ts |
效果:访问 / → <RouterView> 渲染 HomeView;访问 /about → <RouterView> 渲染 AboutView。
Vue3 版本的 <RouterView> 不只是一个静态占位符,它是一个具名插槽组件,会向插槽暴露一些非常有用的上下文属性(slot props):
| 属性名 | 类型 | 说明 |
|---|---|---|
Component |
VNode |
当前匹配的组件(可以用 <component :is="Component"> 渲染) |
route |
RouteLocationNormalizedLoaded |
当前匹配的路由对象 |
isActive |
boolean |
是否是当前激活的视图(嵌套路由时使用) |
index |
number |
嵌套路由层级索引 |
最常见的形式:
1 | <!-- App.vue --> |
实际上,这就是 <RouterView /> 内部的工作原理。Vue Router 内部其实就是这么渲染当前匹配组件的。
3.3.2 常见使用场景
① 配合 <keep-alive> 缓存页面
1 | <!-- App.vue --> |
当路由的 meta 配置为 { keepAlive: true } 时,该页面将被缓存;切换回来时不会重新加载。
1 | // router/index.ts |
② 多级嵌套路由
如果路由是多级嵌套的,每一层的 <RouterView> 都会向下层传递自己的 Component。例如:
1 | // router/index.ts |
App.vue:
1 | <template> |
LayoutView.vue:
1 | <template> |
UserLayout.vue:
1 | <template> |
效果:每层 RouterView 会渲染当前层级对应的组件。